If you’ve always wanted your own Counter-Strike: Global Offensive server, but haven’t had a chance to rent it, you’re lucky! CS.MONEY here to tell you how to create a free server for three months.
What Is a Server?
Counter-Strike: Global Offensive works on a client-server basis, meaning you have a game client installed on your computer and there’s a PC with the server configuration elsewhere. To play the game, you have to connect the client to the server. This is a good solution. If the server can handle the load, all clients will have excellent performance and a smooth gaming process.
Roughly speaking, Counter-Strike: Global Offensive uses two types of servers. We’ll call them “official” and “third-party” servers. The former are those maintained by Valve itself. A simple example: each match in ranked matchmaking is played on an official server.
Third-party servers are community servers. They can have user modifications, disabled VAC, or maps from the Workshop. Also, on such servers, you can play in unique modes, such as deathmatch with only headshot damage.
Free Server from Google
Having your own server entails expenses. You either need to create a server yourself, for which purpose it’s recommended to have a static IP address and, ideally, a separate PC, or you can rent it. Renting a server with fifteen slots for training will cost about $15 per month.
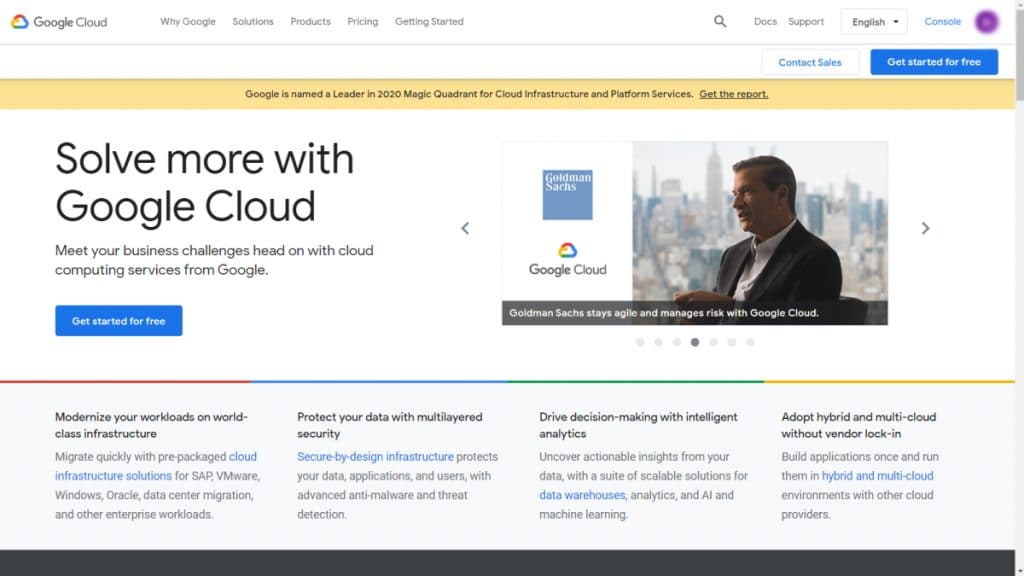
But it’s also possible to try and do everything yourself and for free. To this end, you’ll need to use Google Cloud with a three-month trial period. We discovered this idea on the game’s subreddit in a post by the user k97513. Thanks to him for the tip!
To create your server, you’ll have put in a little effort, so we wrote a six-step instruction for you. Here we go!
Step 1: Create Your Server
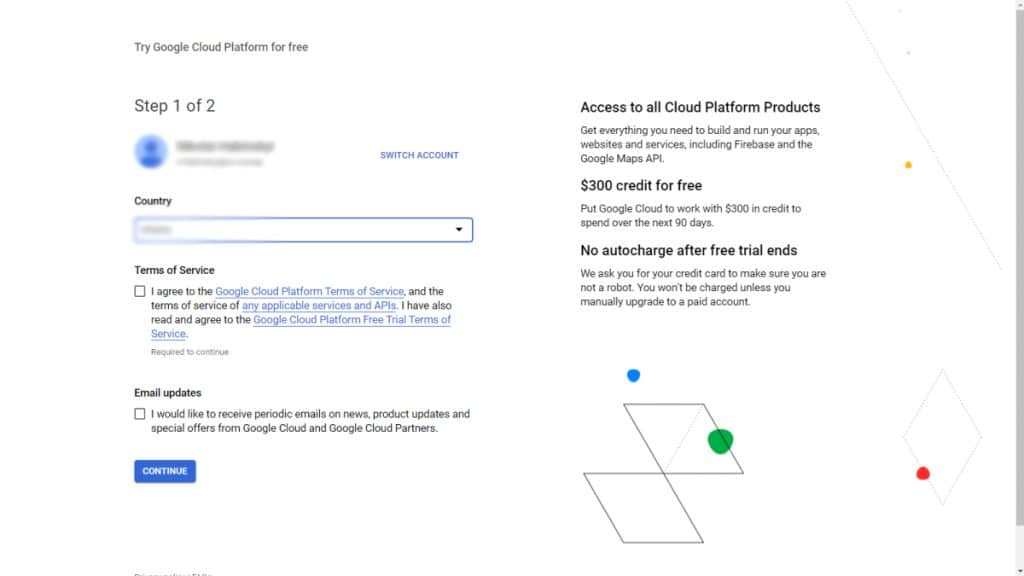
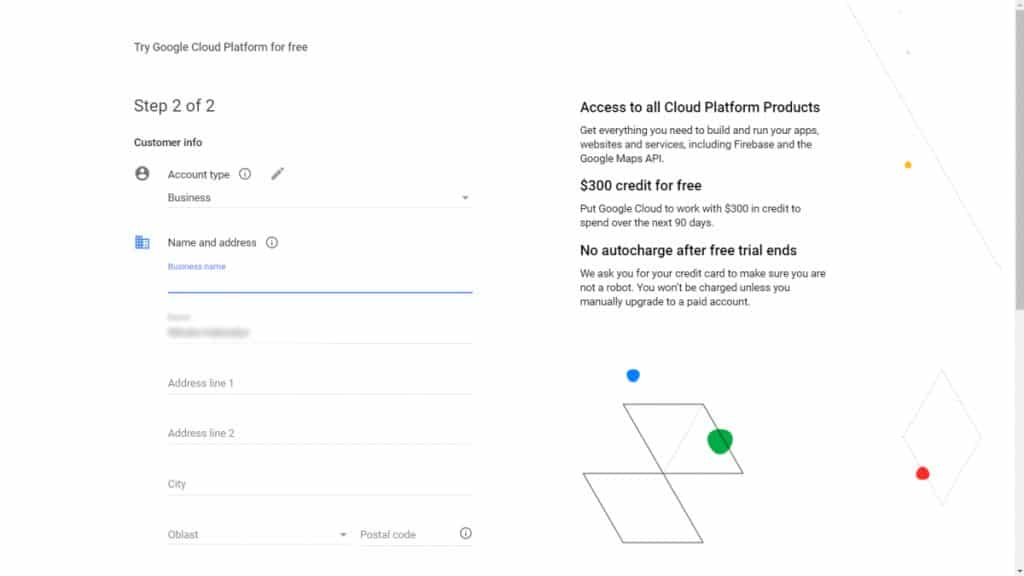
This requires a Google account and a bank card. If you have both, go to Google Cloud, log in and click “Get started for free.” After that, you’ll need to fill in all the necessary fields on the two screens and finally log in to the site.
“Free” start means Google is giving you 300 dollars and the opportunity to use the Google Cloud service for three months, with these 300 dollars being “virtual” and only capable of being spent on the service and in no other way. The advantage to this is that the company won’t demand the money back nor will it start withdrawing money from the specified card without the user’s direct permission.
Simply put, after registration, you can toy around with the service for a total of three months, and when the money in the account runs out, nothing will happen except the “fun” will end and you’ll have to pay for its continuation.
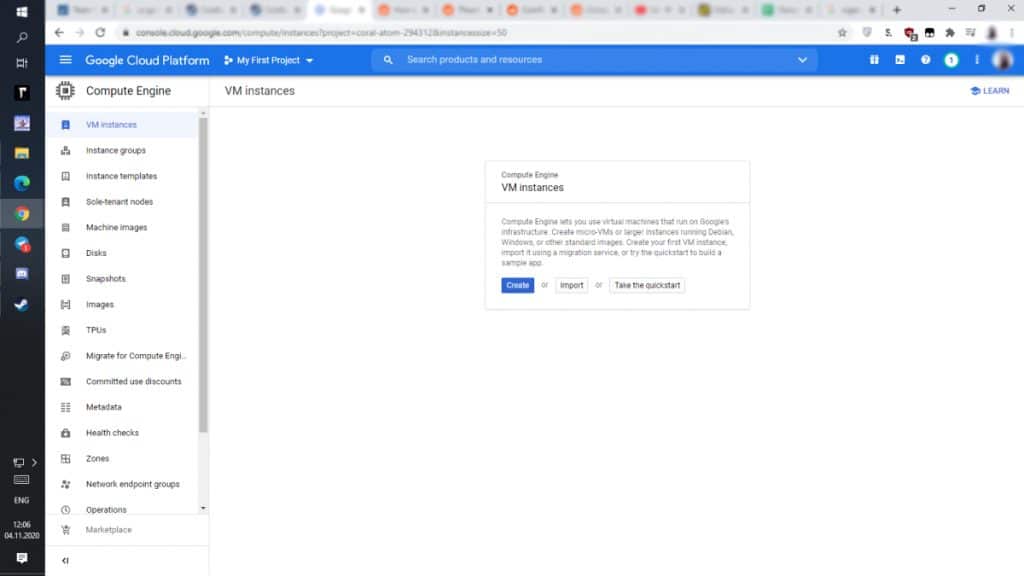
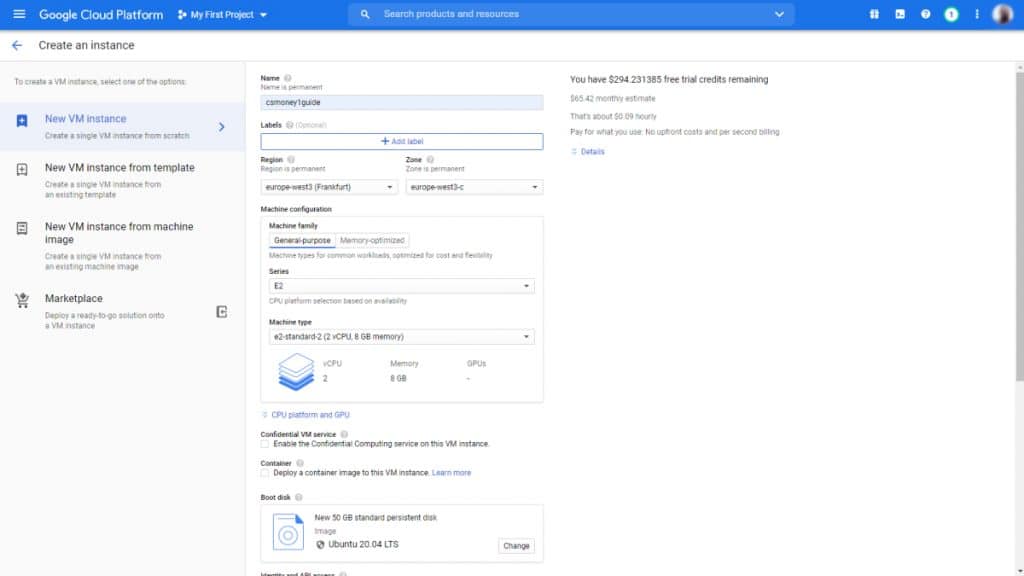
In the site’s main tab, in the left panel, select “Compute Engine.” In the window that opens, click “Create Instance” at the top. Now you need to name the server, select the configuration, and specify the size of the disk, together with the used distribution kit. We only live once, so we recommend that you opt for the latest Ubuntu. In our case, it’s 20.04 LTS with October updates.
After you’ve handled this, all you have to do is click “Create” and the server is ready.
Step 2: Configuring the Network
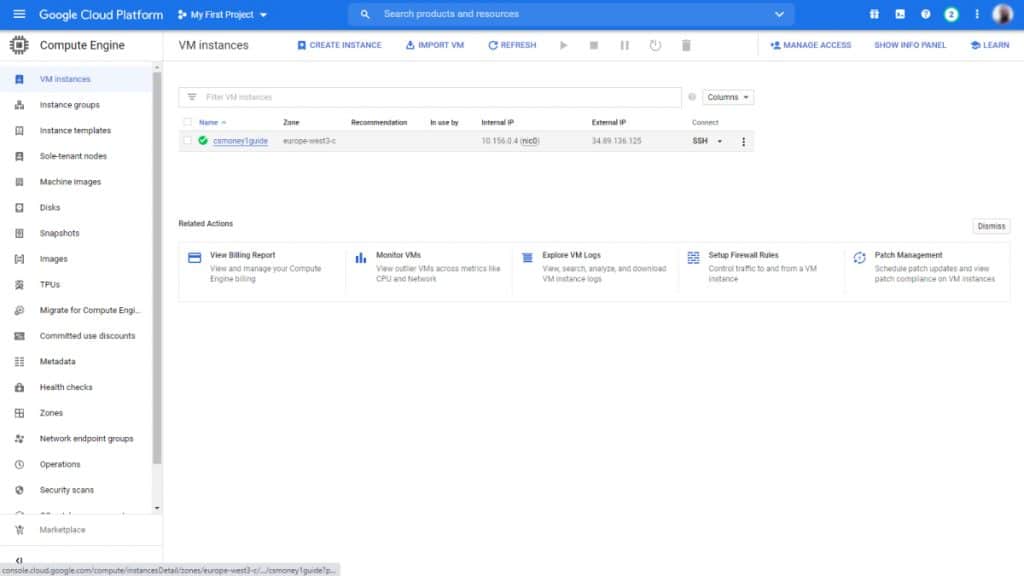
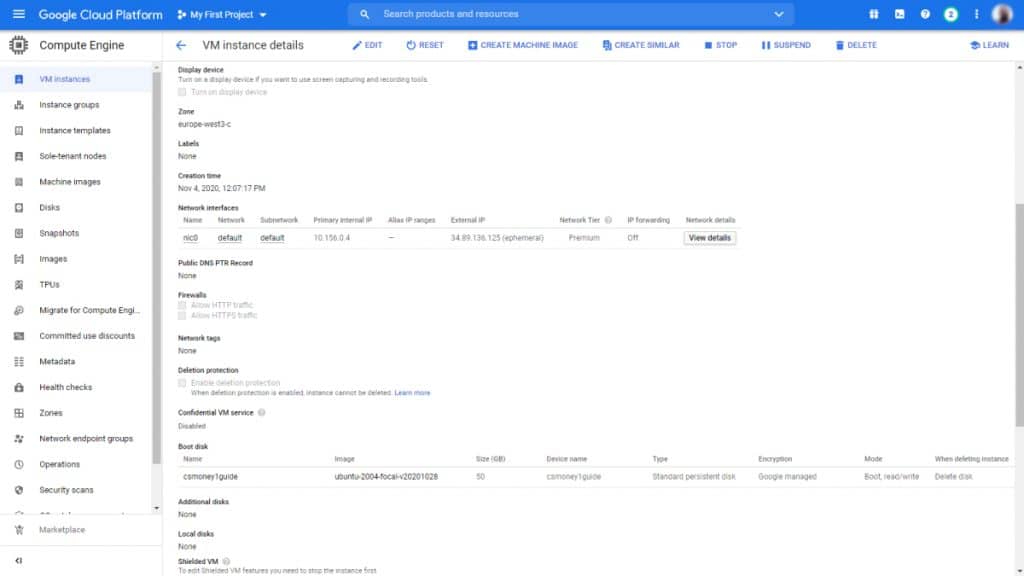
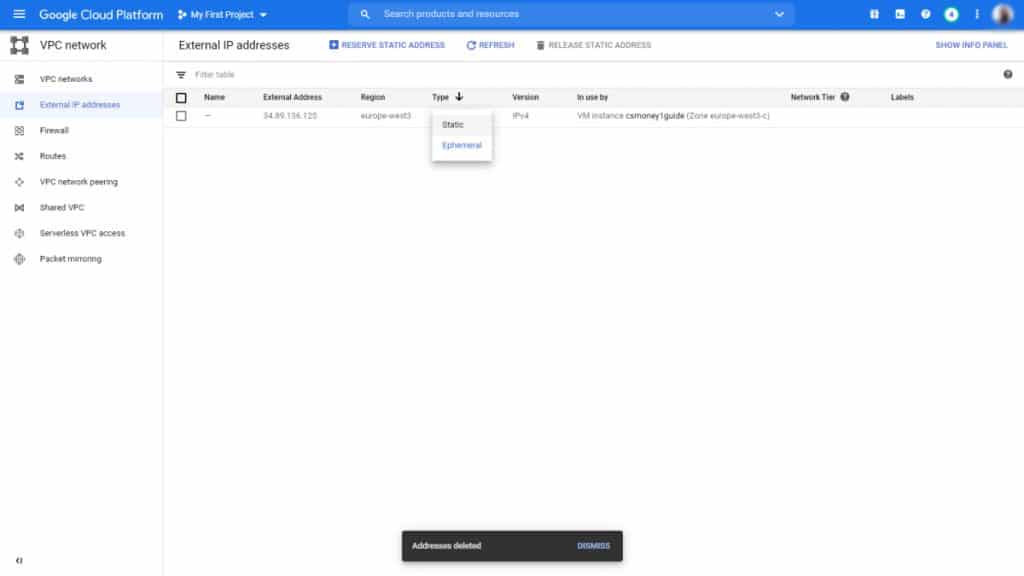
The VM instances tab should now show a server with the selected name. Click on the name, scroll down to Network interfaces, and select “View Details.” In this section, open “External IP addresses” first. In the table, change the IP type to Static.

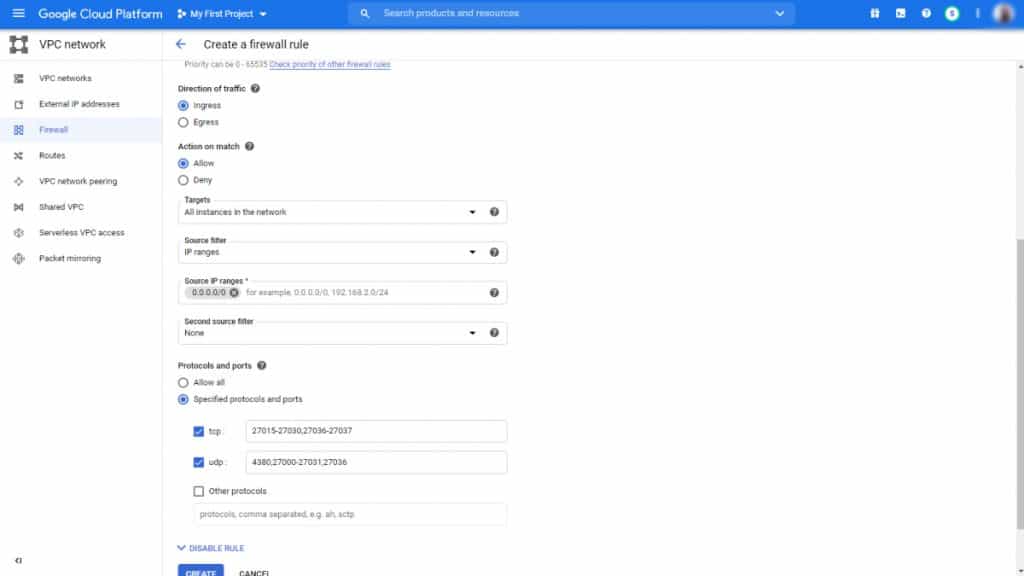
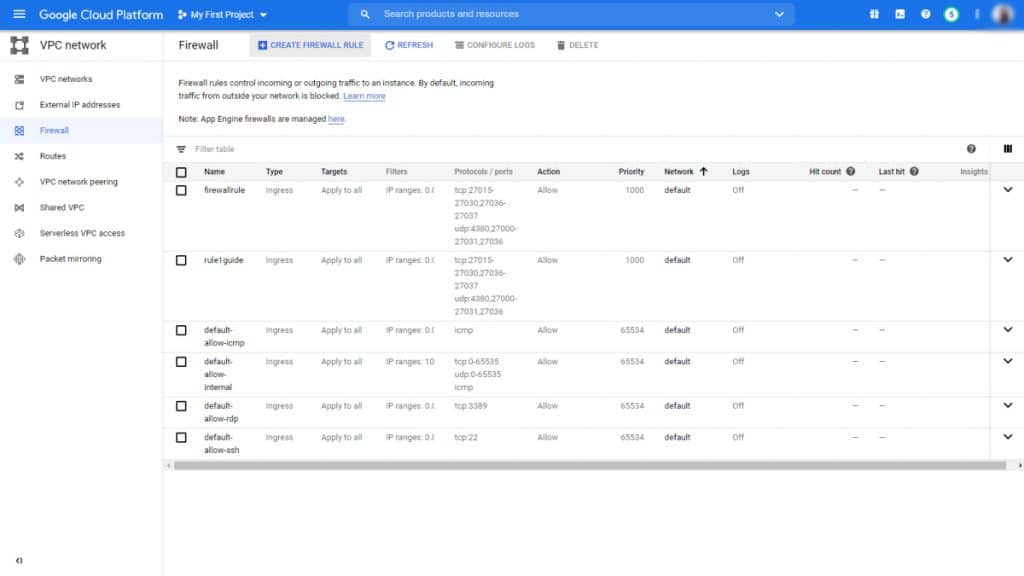
Then, select “Firewall” on the left panel and create a new rule. This can be done by clicking the button at the top of the screen. The rule must be given a name. After you scroll below the name, you’ll need to set the following parameters:
- “All instances in the network” in the “Targets” line;
- “0.0.0.0/0” in the “Source IP ranges” line;
- Check the boxes for “tcp” and “udp” and enter “27015-27030,27036-27037” and “4380,27000-27031,27036” in the respective fields.
Then, click “Create” to establish a rule and return to the VM instances tab.
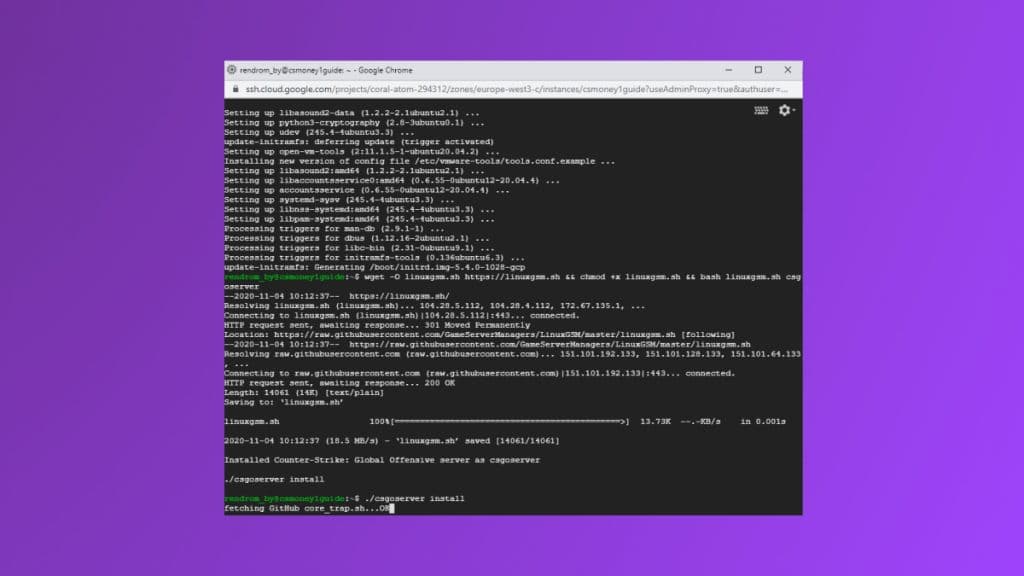
Step 3: Installation
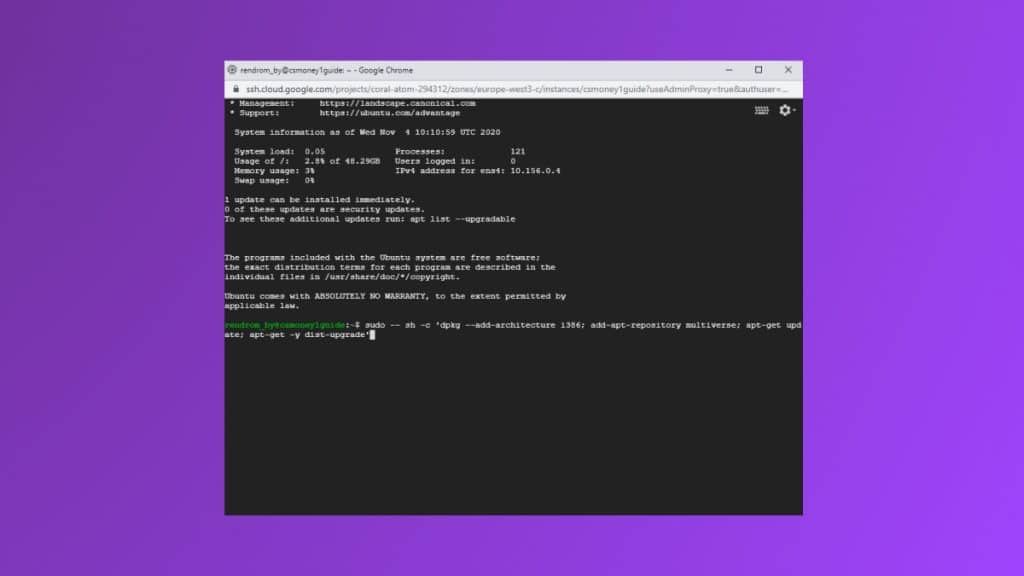
You’re almost there, the only thing left is to turn a regular Google server into a gaming one. For this purpose, open the terminal by clicking “SSH” in the VM instances tab. In the terminal, enter three commands in the given order.

First: sudo — sh -c ‘dpkg –add-architecture i386; add-apt-repository multiverse; apt-get update; apt-get -y dist-upgrade’.
Second: wget -O linuxgsm.sh https://linuxgsm.sh && chmod +x linuxgsm.sh && bash linuxgsm.sh csgoserver
And finally: ./csgoserver install
After entering each command, you’ll need to confirm the action with the Enter key. While the first two commands will be executed quickly, the third may take up to half an hour.
After the installation is complete, a question will appear in the terminal that can be ignored — just continue by pressing Enter.
Step 4: Launch
Almost there. Now we need to make Steam and the server friends. To do this, visit the Steam Game Server Account Management page. There, scroll down until you see the offer to create a new game server account. In the “App ID” field, enter 730 (the ID of CS:GO), and in the “Memo” field, you can write some useful info.
In the table next to the fields, the entered information with the “Login Token” column will appear. We’ll need it further on, so you’d better copy it somewhere. It’s also advisable to copy the Internal IP from the table in the VM instances screen.
Both values have to be pasted in the template:
screen serverfiles/srcds_run -game csgo -usercon -strictportbind -ip YOURIP -port 27015 +clientport 27005 +tv_port 27020 +sv_setsteamaccount YOURLOGINTOKEN -tickrate 128 +map de_mirage +servercfgfile server.cfg -maxplayers_override 16 +mapgroup mg_active +game_type 0 +game_mode 1 +host_workshop_collection +workshop_start_map -authkey -nobreakpad
Add the resulting structure should to the start.sh file. To do this, enter “nano start.sh,” then paste using the CTRL + V hotkey, save by CTRL + S, and exit by CTRL + X.
To finish with the launch, just one more action is required: enter “sh start.sh.” That’s it. Yay. Congratulations, you have the most regular 128 tick empty competitive server.
Step 5: Backup Copy
If you’re going to do something other than regular play on your most regular server, consider making a backup. It’ll help reverse all changes in case, say, the installation of a mod goes wrong. A most useful thing indeed.
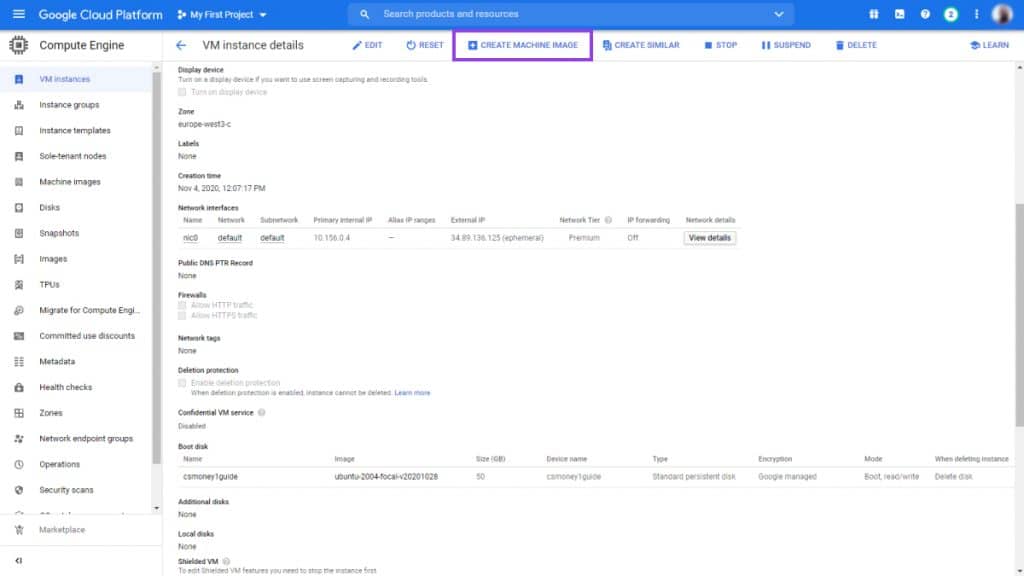
Making a backup copy of the server is extremely easy. Just click on the server name in the VM instances tab and select “Create machine image” at the top of the window that opens. Then, name the backup and, as always, click “Create.” That’s it. The backup is ready.
If you do everything thoroughly and by the instructions, you can finish within an hour. Just an hour — and you’ll have a personal server in your pocket for 3 months of any experiments or training. And to make training more fun, don’t forget to go to our website and buy a couple of cool skins. They’ll definitely please the eye.